Restoring 150-year-old pine trim one layer at a time—preservation over replacement.
The Story
When you live in an 1866 historic home, you learn to see past what’s on the surface. Beneath eight layers of paint on our wood trim was the original pine—dense, old-growth lumber that you simply can’t buy anymore. Most people would rip it out and install new trim from the hardware store. We decided to restore it instead.
The project spanned two rooms—the front room and the sitting room—and took ten months of part-time work. That’s not a typo. Ten months. But when you strip away layer after layer of paint and finally see that original wood grain emerge, you understand why it’s worth the effort.
This isn’t a weekend project. It’s a commitment. But for those restoring a historic home, or anyone who believes that what we preserve is as important as what we create new, the work pays off.
Key Details
Timeline: 10 months (part-time) | Rooms: 2 (front room, sitting room) | Paint Layers: 8 | Wood Type: Pine | Finish: Clear coat
Sustainability Note: Restoring original materials keeps 150+ year old wood in use instead of sending it to a landfill and manufacturing new trim. Old-growth pine is denser and more durable than anything you’ll find at a lumber yard today. Preservation is the ultimate form of sustainability.
The Method
I used a combination of heat gun and chemical stripper. Each has its place, and I learned through trial and error when to use which.
Heat Gun
The heat gun works well for getting through thick layers quickly. You heat a section until the paint bubbles, then scrape it off while it’s still soft.
The catch: It’s easy to burn the wood if you’re not careful. I learned this the hard way. Keep the gun moving, don’t linger in one spot, and watch for scorching. Once you burn the wood, you can’t undo it.
Chemical Stripper
Chemical stripper became my go-to method, especially as I got better at it. The key discoveries:
- Apply it thick. A thin layer doesn’t penetrate well. Glob it on.
- Leave it overnight. The longer it sits, the better it works. I’d apply in the evening and scrape the next morning.
- Cover with plastic wrap. This was a game-changer I discovered near the end of the project. Once the stripper dries, it stops reacting. Plastic wrap keeps it wet and working.
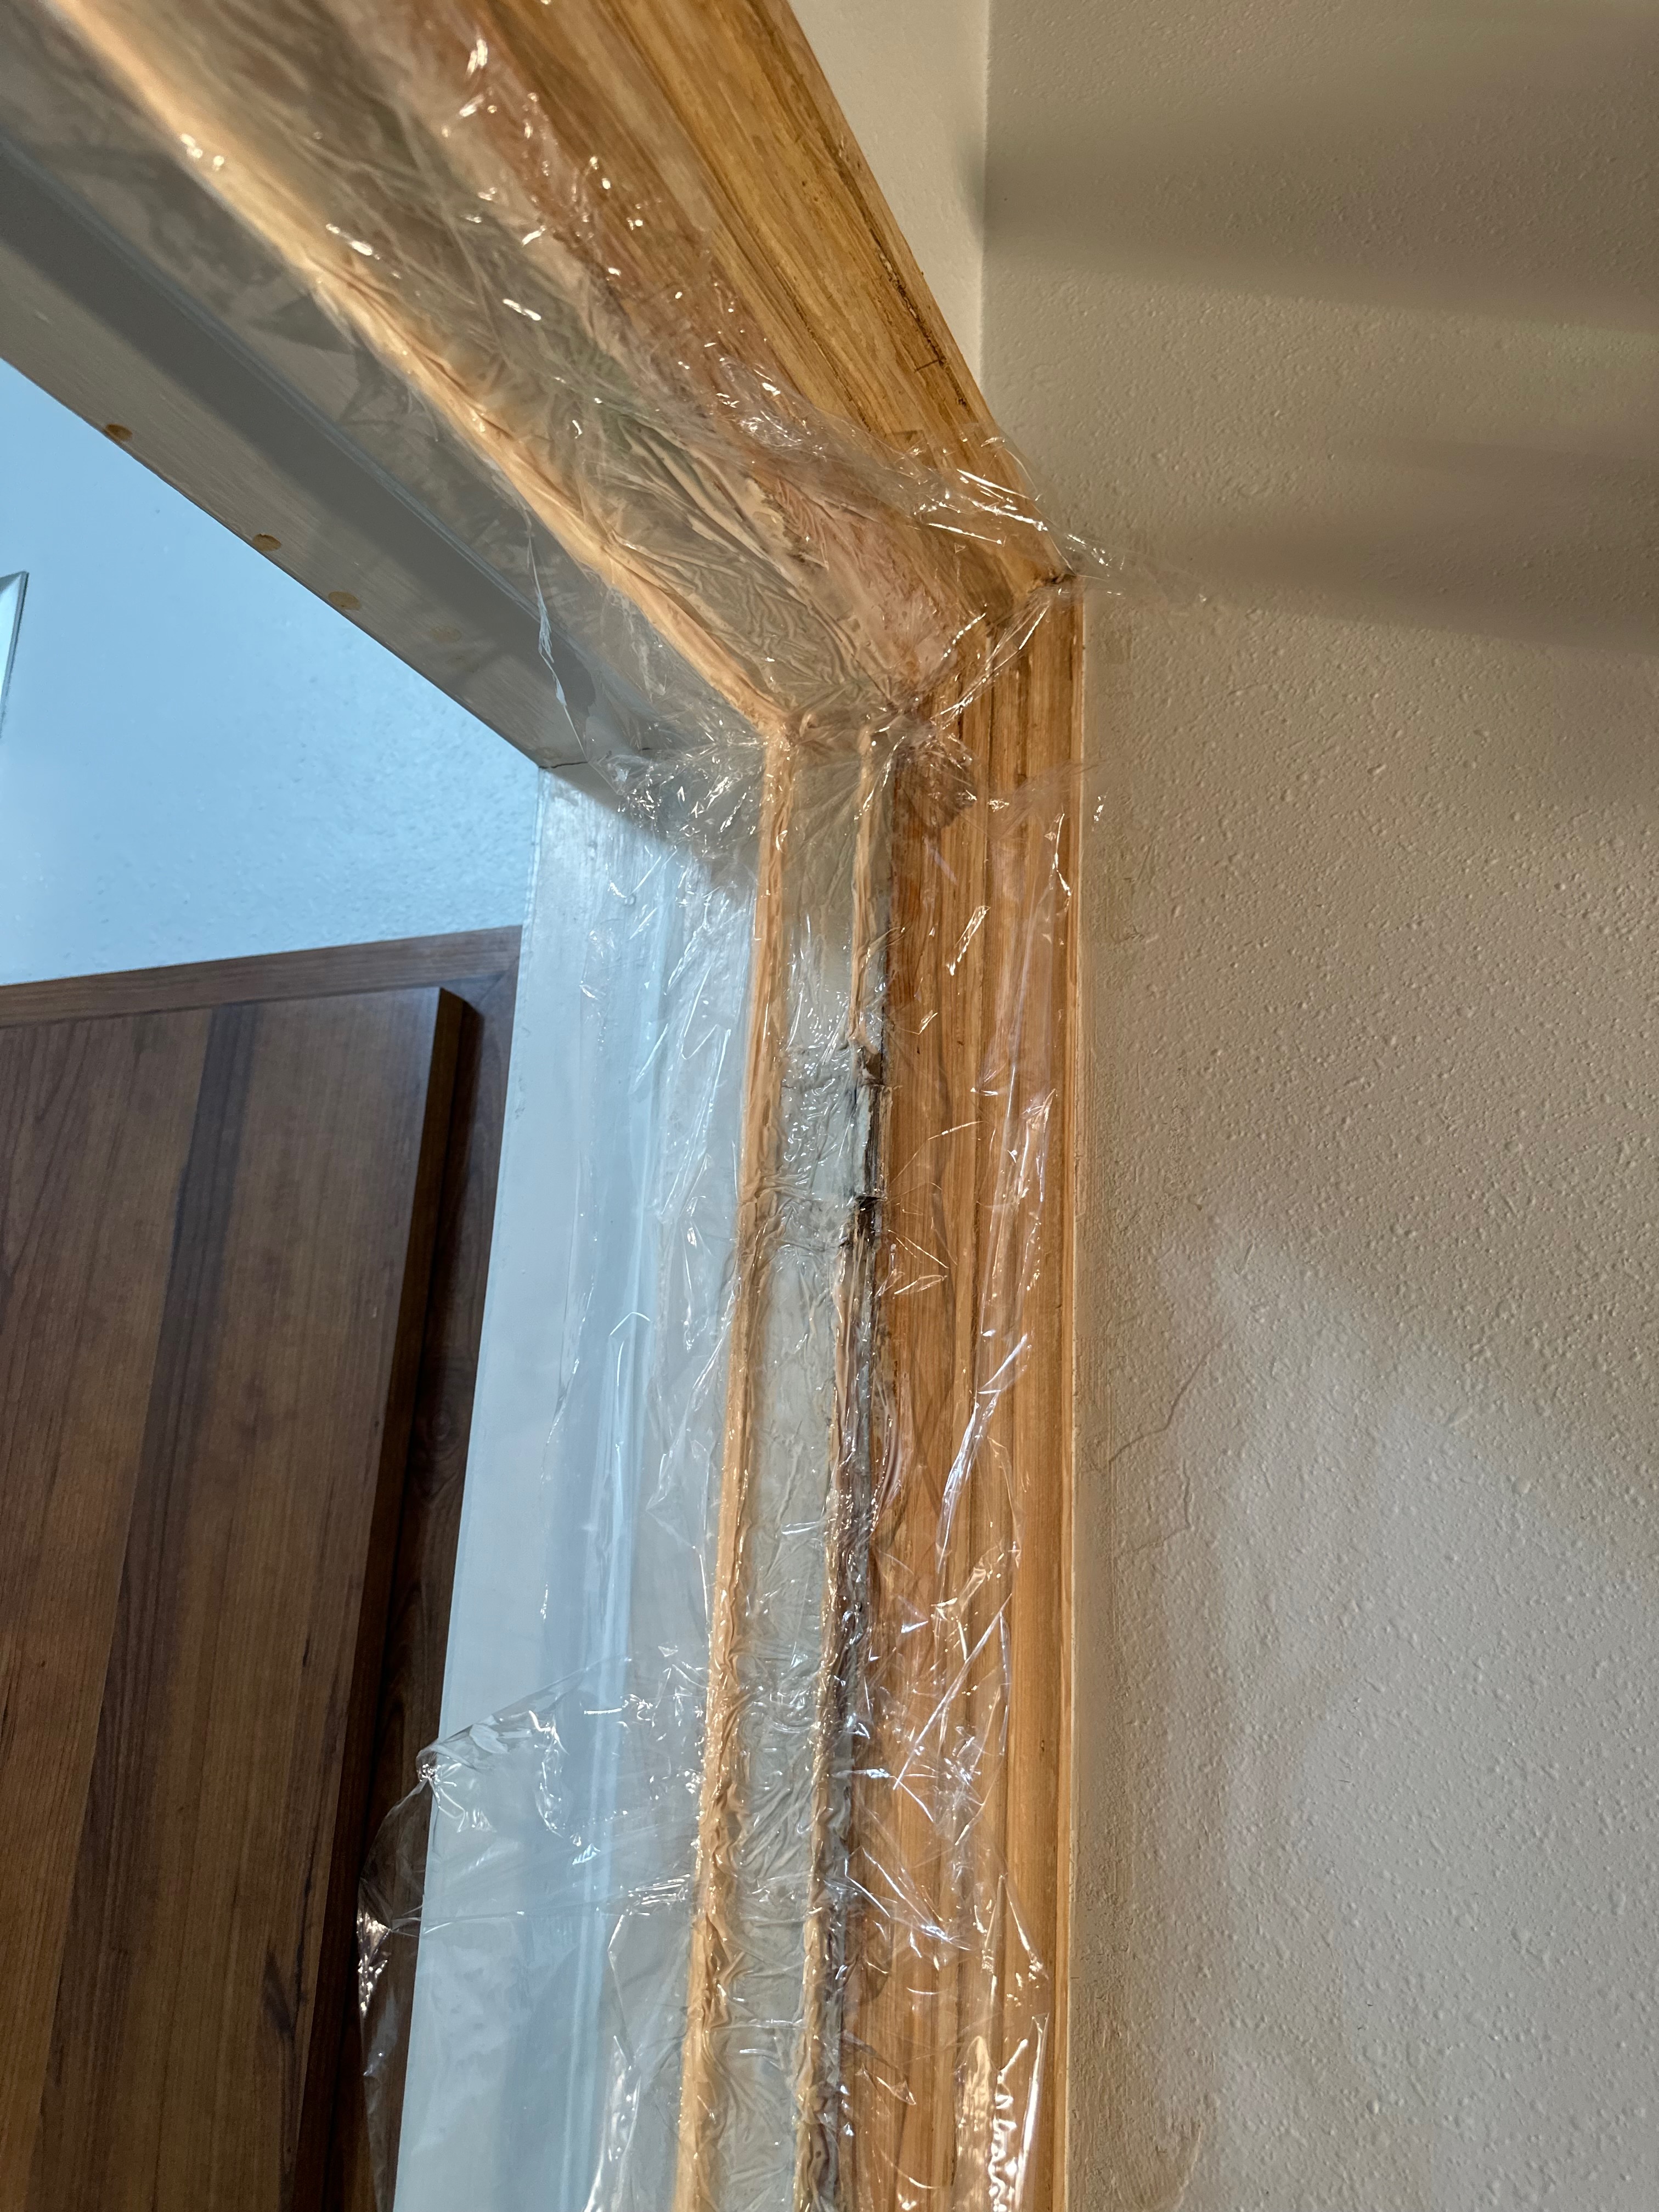 The plastic wrap trick: keeps the stripper wet so it keeps working overnight.
- Keep it off the walls. The stripper will damage painted walls if you let it sit there. Tape off carefully and wipe up any drips immediately.
Scraping and Cleanup
After the paint softens (from heat or stripper), scraping removes it. Be gentle—the wood underneath has been there for 150 years. Aggressive scraping leaves gouges that show through the finish.
I used mineral oil to clean up after scraping. It removes residue and gives you a preview of how the wood will look with a clear finish.
The Reality Check
This project took ten months. Part-time, yes—but ten months. If you’re restoring trim throughout an entire historic home, you’re looking at years of work.
I never tested for lead paint. Our home was built in 1866, which means there are almost certainly lead paint layers in those eight coats. If you’re doing this project, you should test and take appropriate precautions—proper respirator, wet scraping techniques, containment, and cleanup protocols. Don’t do what I did.
The time investment is real. Is restoration worth it compared to replacement? That depends on your values. New trim is faster. Restoration preserves history, keeps old-growth wood in use, and creates zero waste. For us, that mattered more than speed.
Lessons Learned
What I wish I’d known before starting:
-
Heat guns burn wood easily. Keep it moving. The moment you see the paint bubble, start scraping. Don’t wait.
-
Chemical stripper works best overnight. Don’t rush it. Apply thick, leave it for hours (or overnight), and let it do the work.
-
Plastic wrap is the secret weapon. Covering the stripper prevents it from drying out. Dried stripper stops working. I discovered this near the end of the project and wished I’d known it from day one.
-
Be gentle with the scraper. The wood is softer than you think, especially after the stripper has been working on it. Light pressure, multiple passes.
-
Keep stripper off the walls. It will damage painted surfaces. Tape off carefully and wipe up any drips or splatter immediately.
Tools & Products
Here’s what we used:
Chemical Stripper:
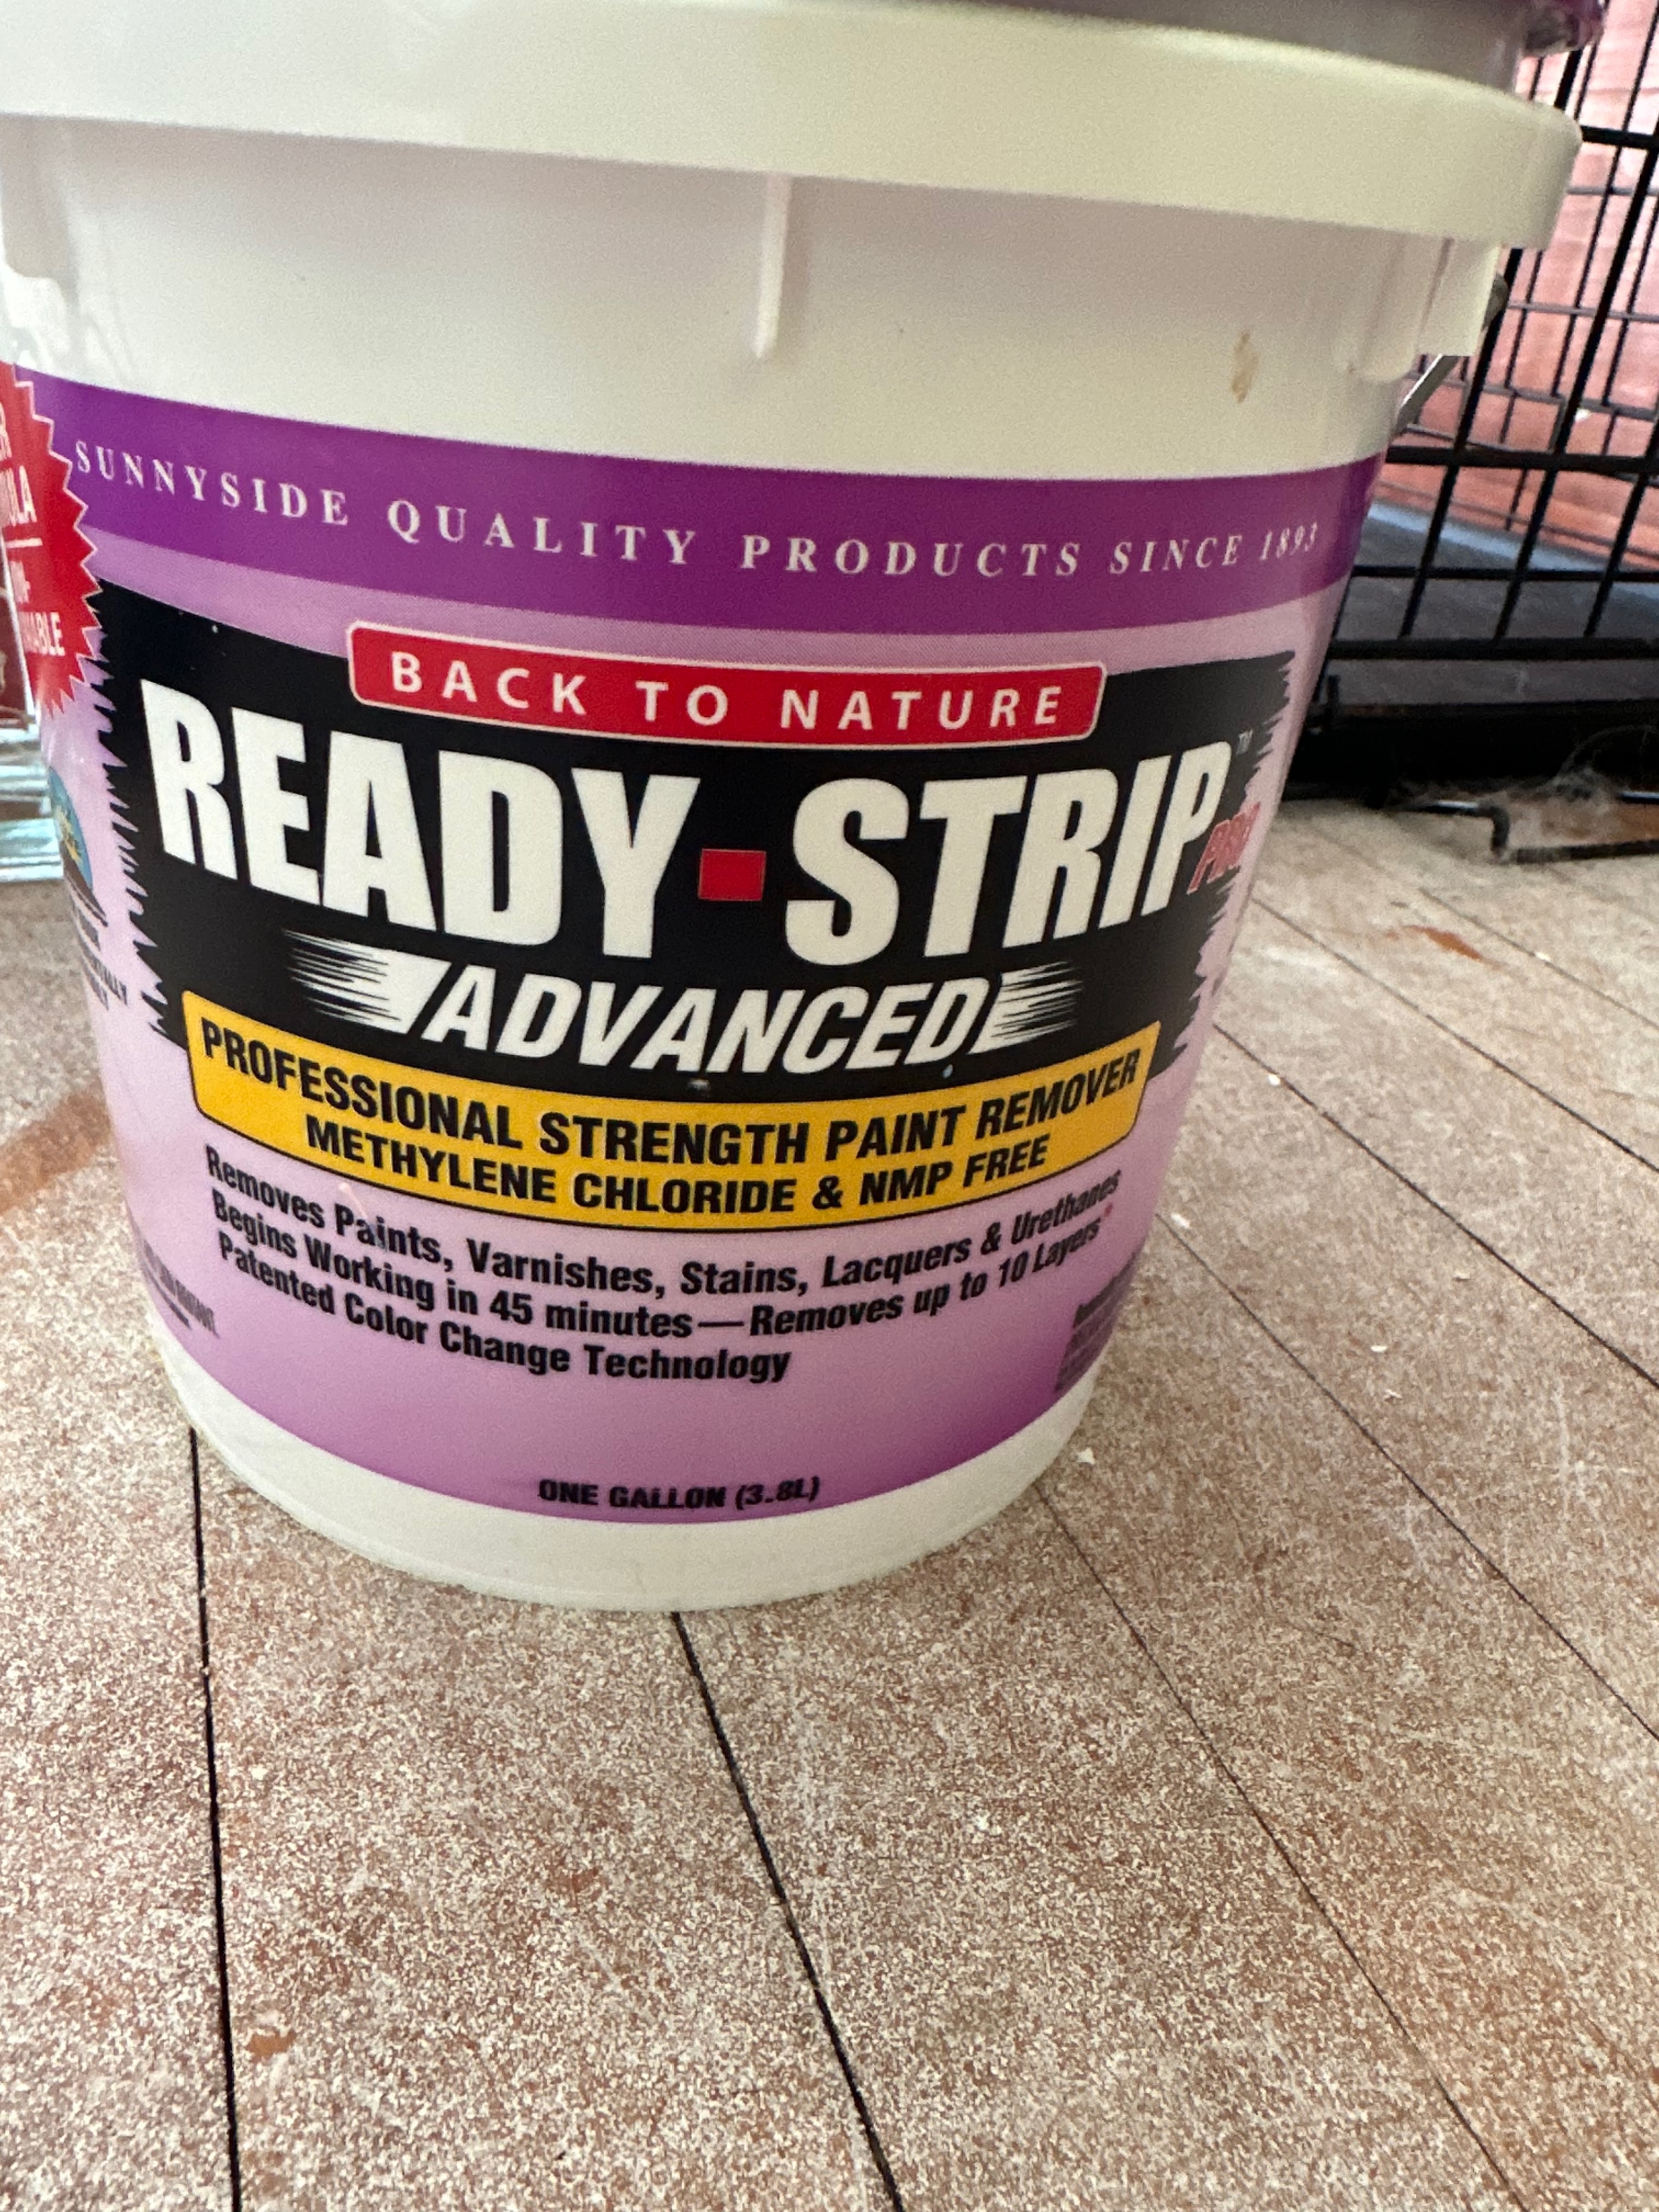
- Back to Nature Ready-Strip Advanced (by Sunnyside) — Professional strength, methylene chloride free. Claims to remove up to 10 layers and has a color-change feature that shows where paint remains. This worked well for our 8 layers.
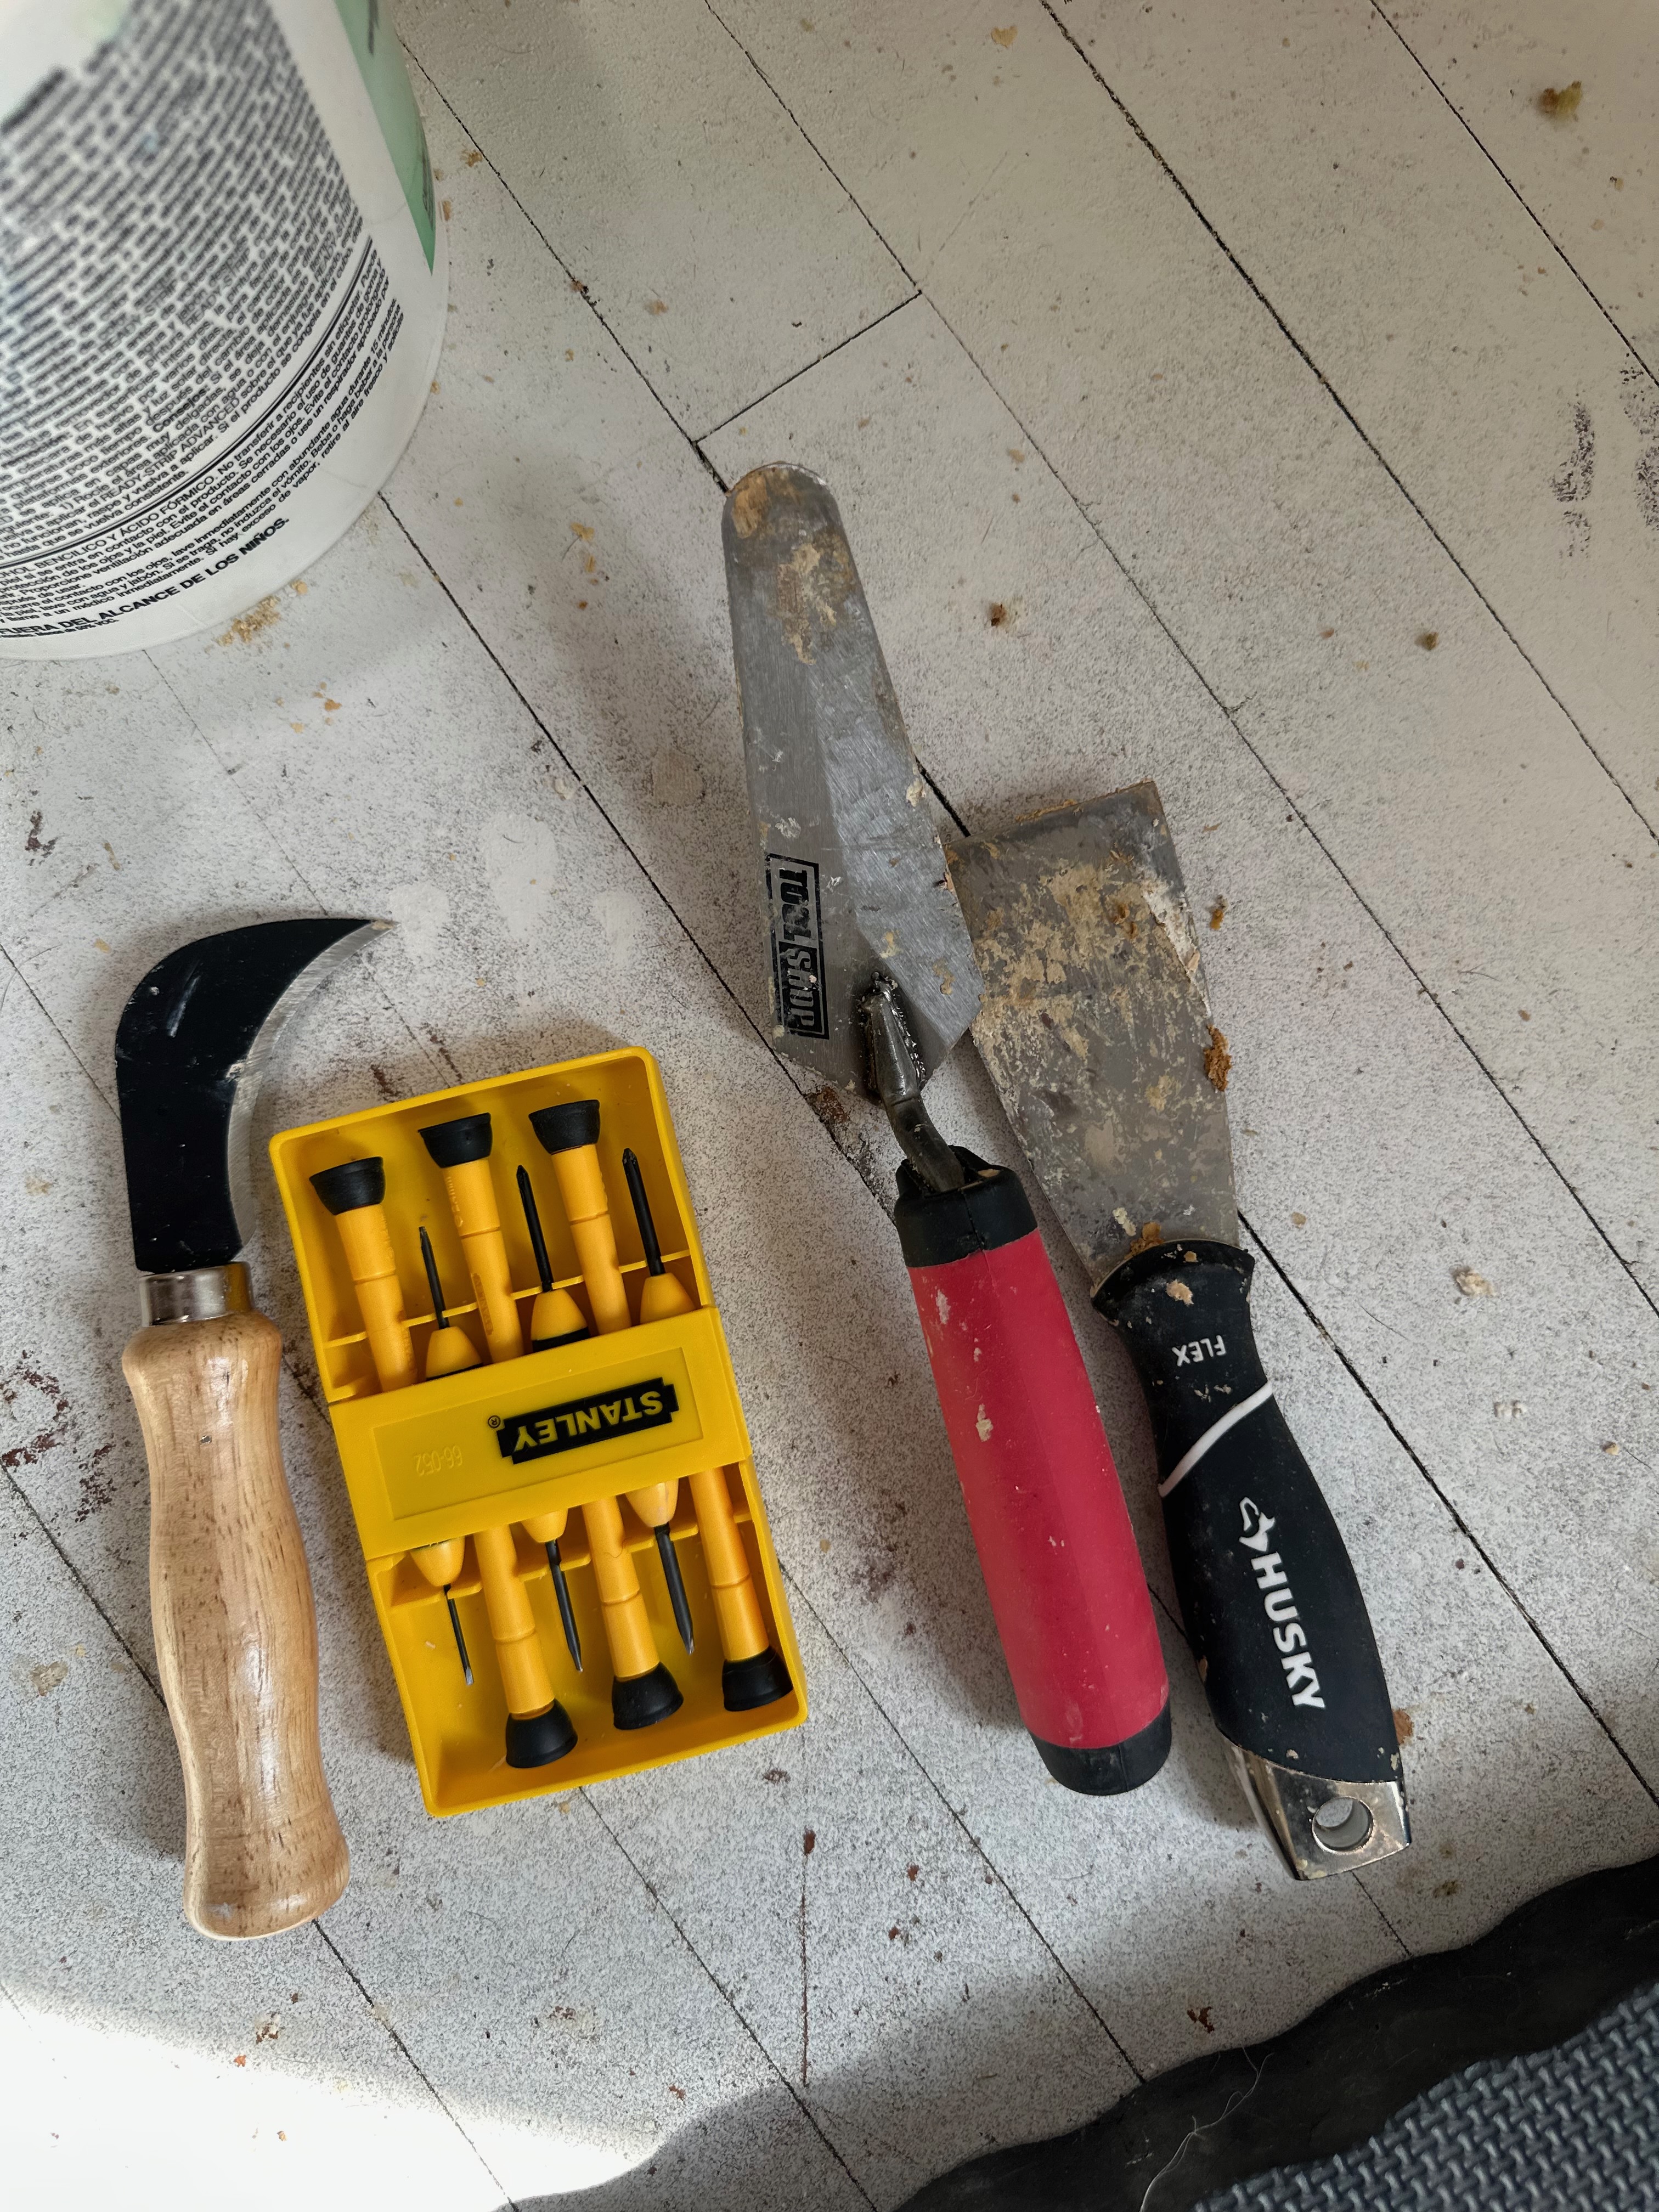
Scrapers:
- Curved hook blade scraper (linoleum knife style) — great for getting into grooves and detail work
- Husky flex scraper — the flexibility helps on curved surfaces
- Standard putty knives in various widths
- Stanley precision screwdriver set — for picking paint out of tight corners and details
Power Tools:
- Heat gun
- Oscillating multi-tool with triangular sanding attachment — perfect for detail sanding in corners and grooves (wear a mask!)
- JET dust collector — we bought this for the sanding phase; worth the investment for controlling dust
Other Supplies:
- Mineral oil — for cleanup and conditioning the wood after scraping
- Plastic wrap — game-changer for keeping stripper wet overnight
- Blue painter’s tape — essential for protecting walls
- Dust masks/respirators — essential during sanding
- Clear coat finish (for final protection)
Why Restore Instead of Replace?
The wood is irreplaceable. Old-growth pine from the 1860s is denser, more stable, and more beautiful than anything you can buy today. Modern pine comes from fast-growth tree farms. The grain is wider, the wood is softer, and it doesn’t have the same character.
Zero waste. Restoration generates no demolition debris, no manufacturing demand, no packaging waste. The trim that was there in 1866 is still there today—just revealed, not replaced.
Preservation of history. Someone milled this wood, installed this trim, and built this house 160 years ago. Keeping their work intact connects us to that history in a way that ripping it out and installing new trim never could.
The sustainability math: Manufacturing new trim requires logging, milling, transportation, and finishing. Restoration requires time, some consumable products, and patience. The environmental footprint isn’t even close.
The Investment
Let’s talk numbers. Our total cost for stripping and refinishing the trim in two rooms came to approximately $19,400. That includes:
- Chemical stripper and supplies
- Tools (scrapers, heat gun, dust collector, sanding equipment)
- Hired help for portions of the stripping and sanding
- Clear coat finish (purchased from the floor refinishing professionals so the trim would match the floors—we applied it ourselves)
Is that a lot? It depends on the alternative.
Replacement would have cost more—and lost more. Custom-milled trim to match historic profiles runs $8-15 per linear foot, plus installation. Our two rooms have extensive trim: bay window with ornate ceiling detail, multiple door frames, baseboards, window casings, and an archway. We’d be looking at similar or higher costs for replacement, and we’d lose the original 150-year-old wood in the process.
The real value is harder to quantify. You can’t buy old-growth pine at any price. The craftsmanship in those original profiles—the curves, the details, the joinery—would cost a fortune to replicate today, if you could find someone willing to do it. And once original trim goes to the landfill, it’s gone forever.
For us, spending $19,400 to preserve irreplaceable materials was the obvious choice. Your math may be different, but the preservation option deserves serious consideration before defaulting to replacement.
Before & After
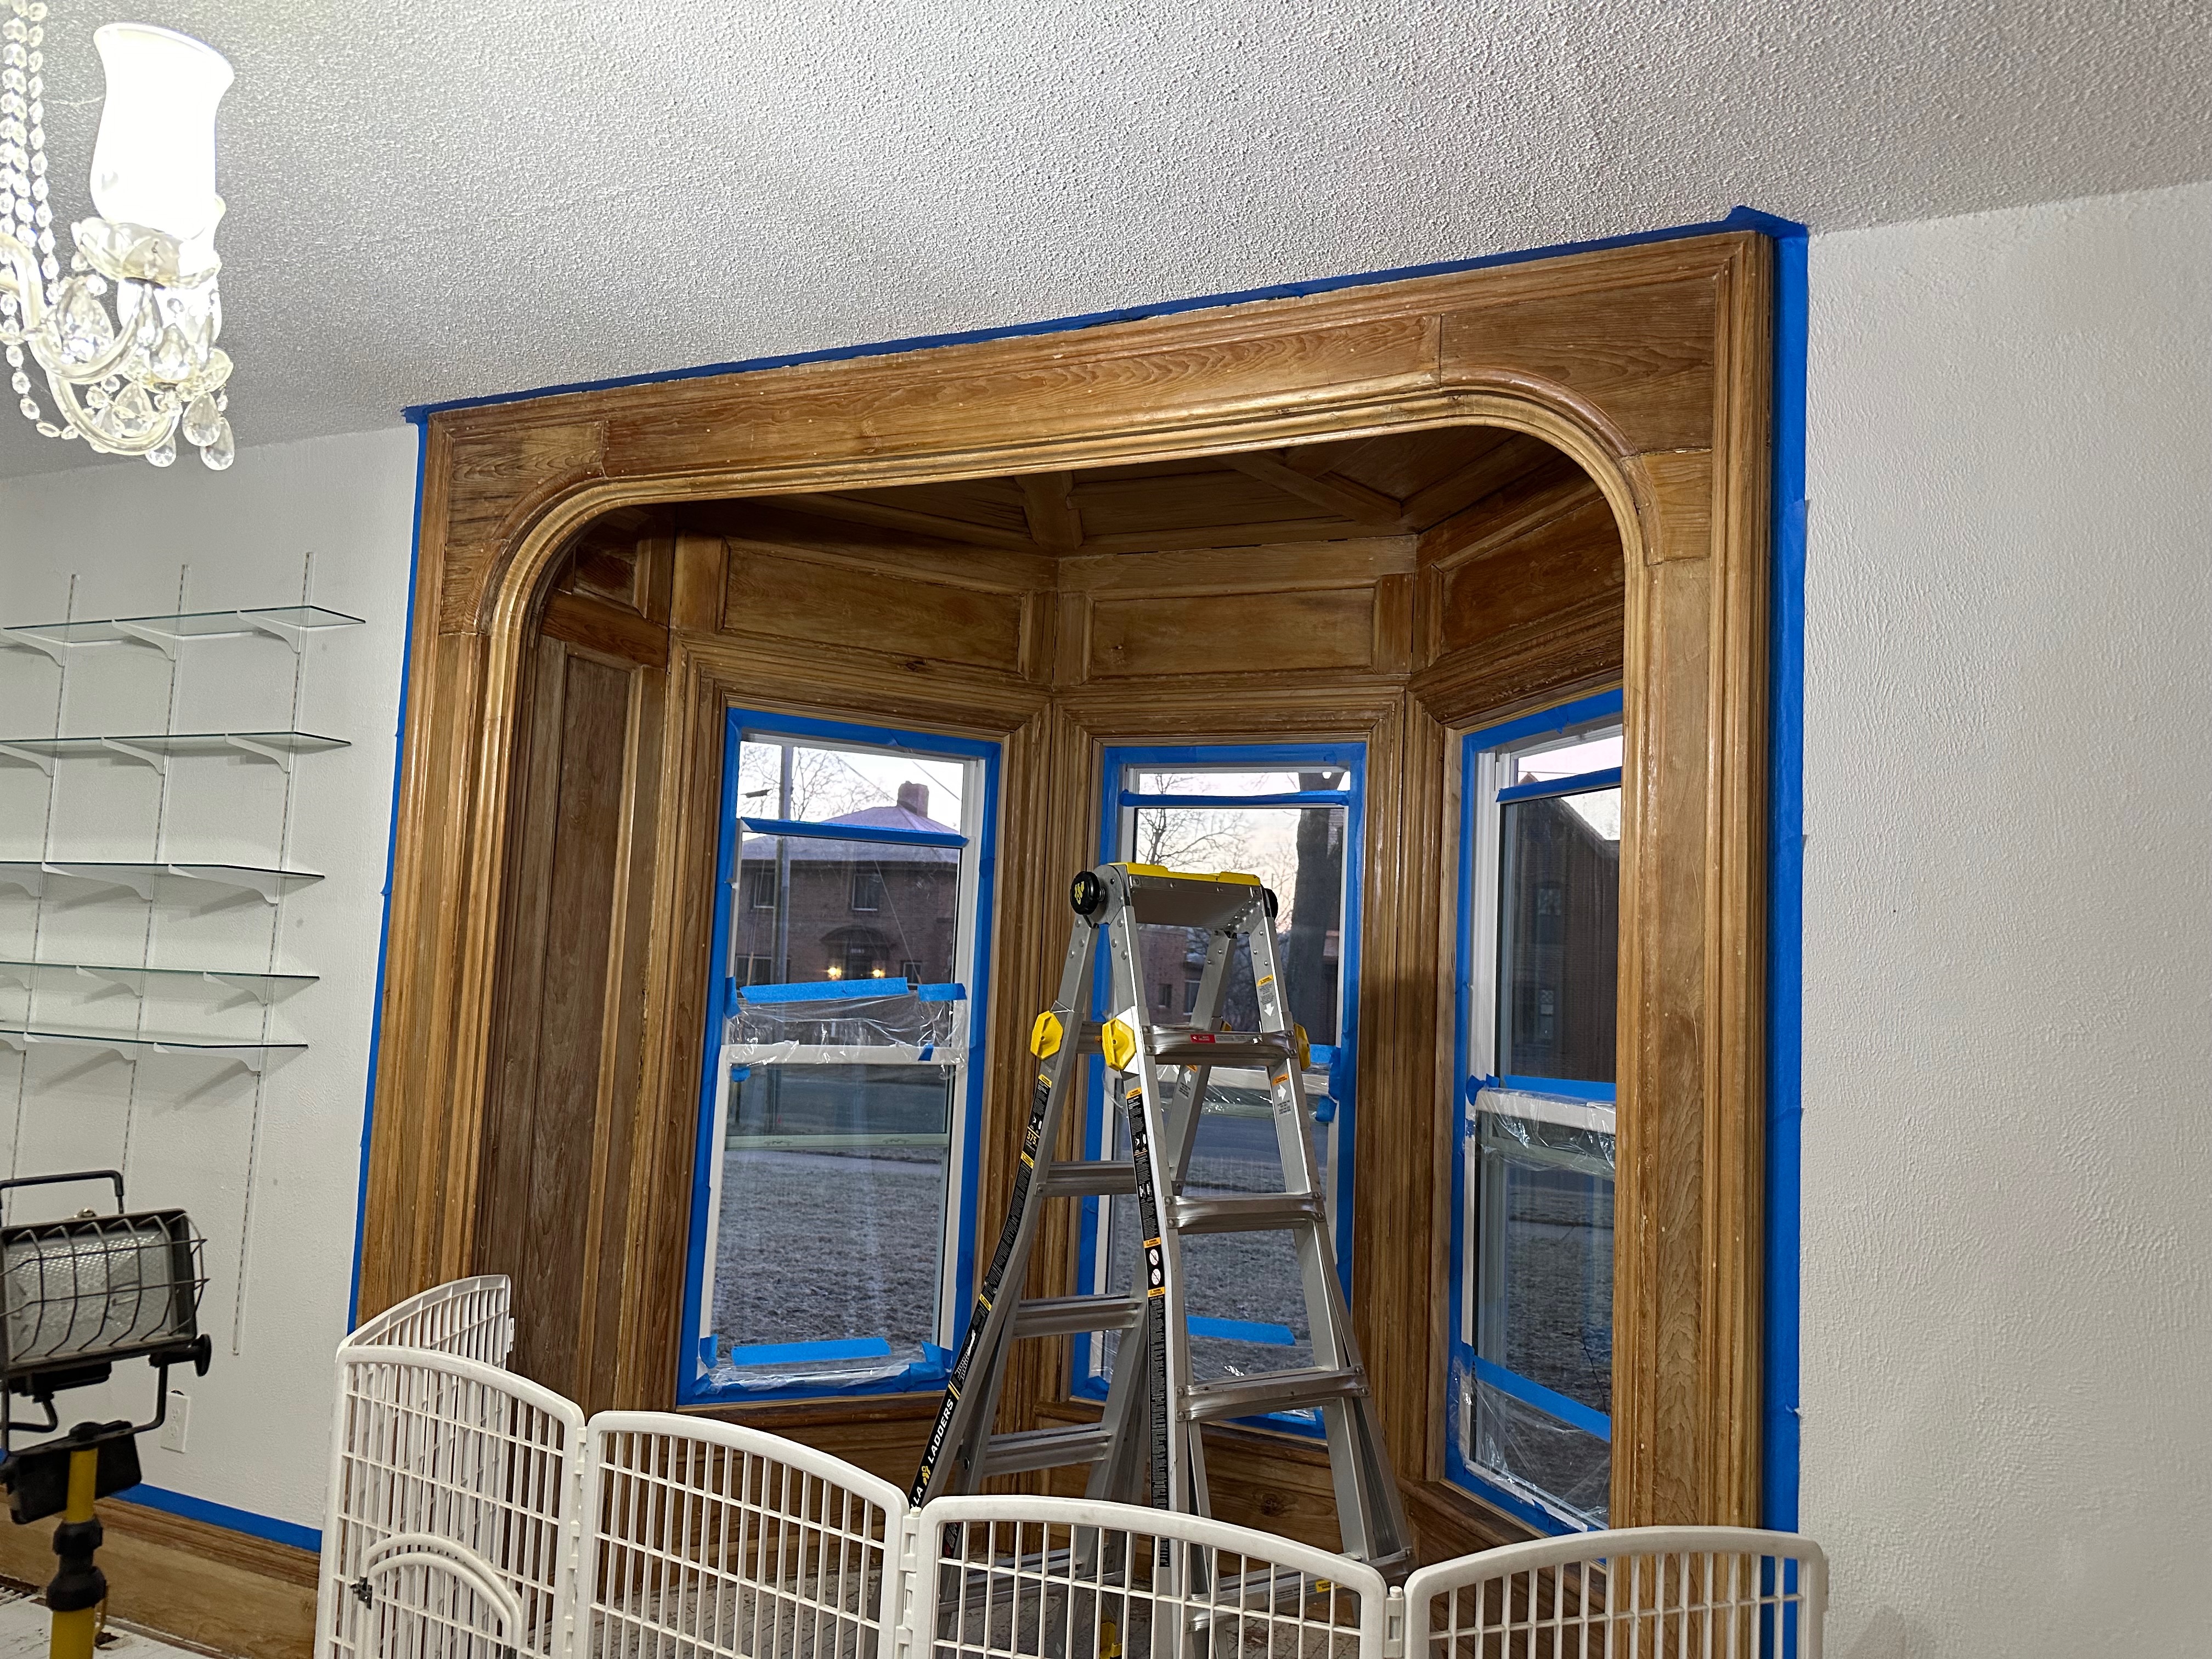
The Bay Window
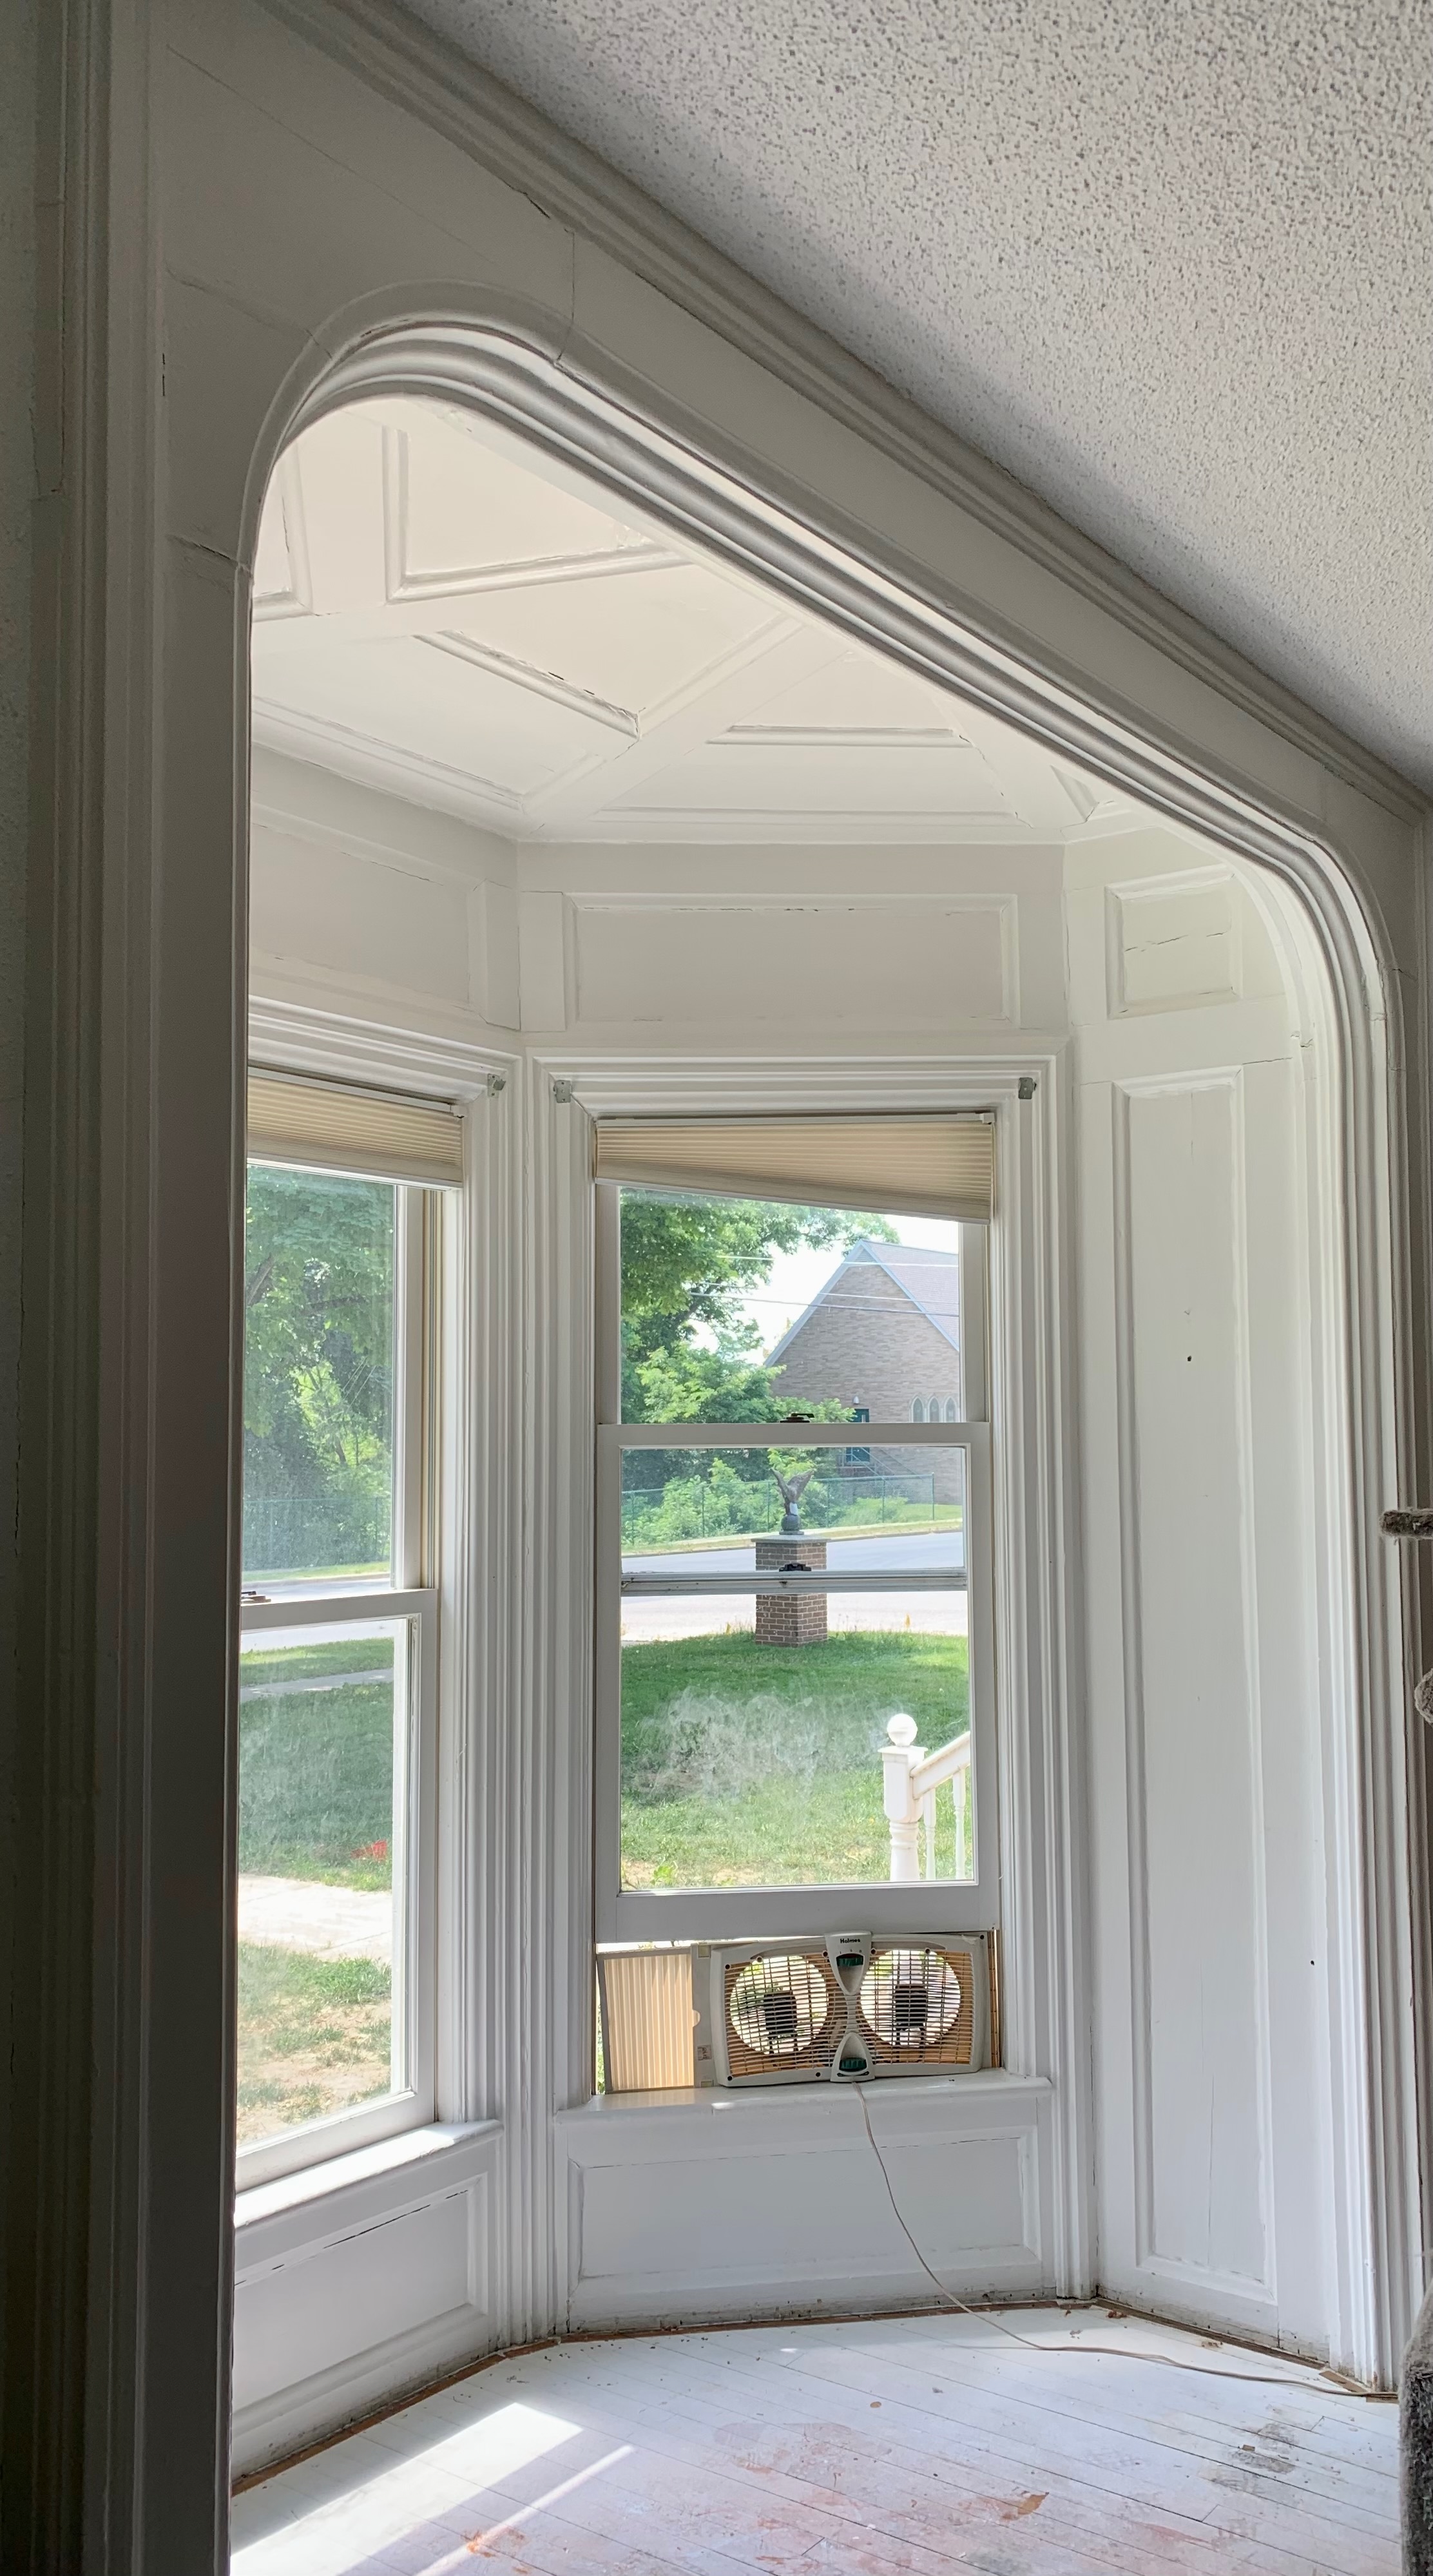
Before: Eight layers of white paint hiding the original pine.
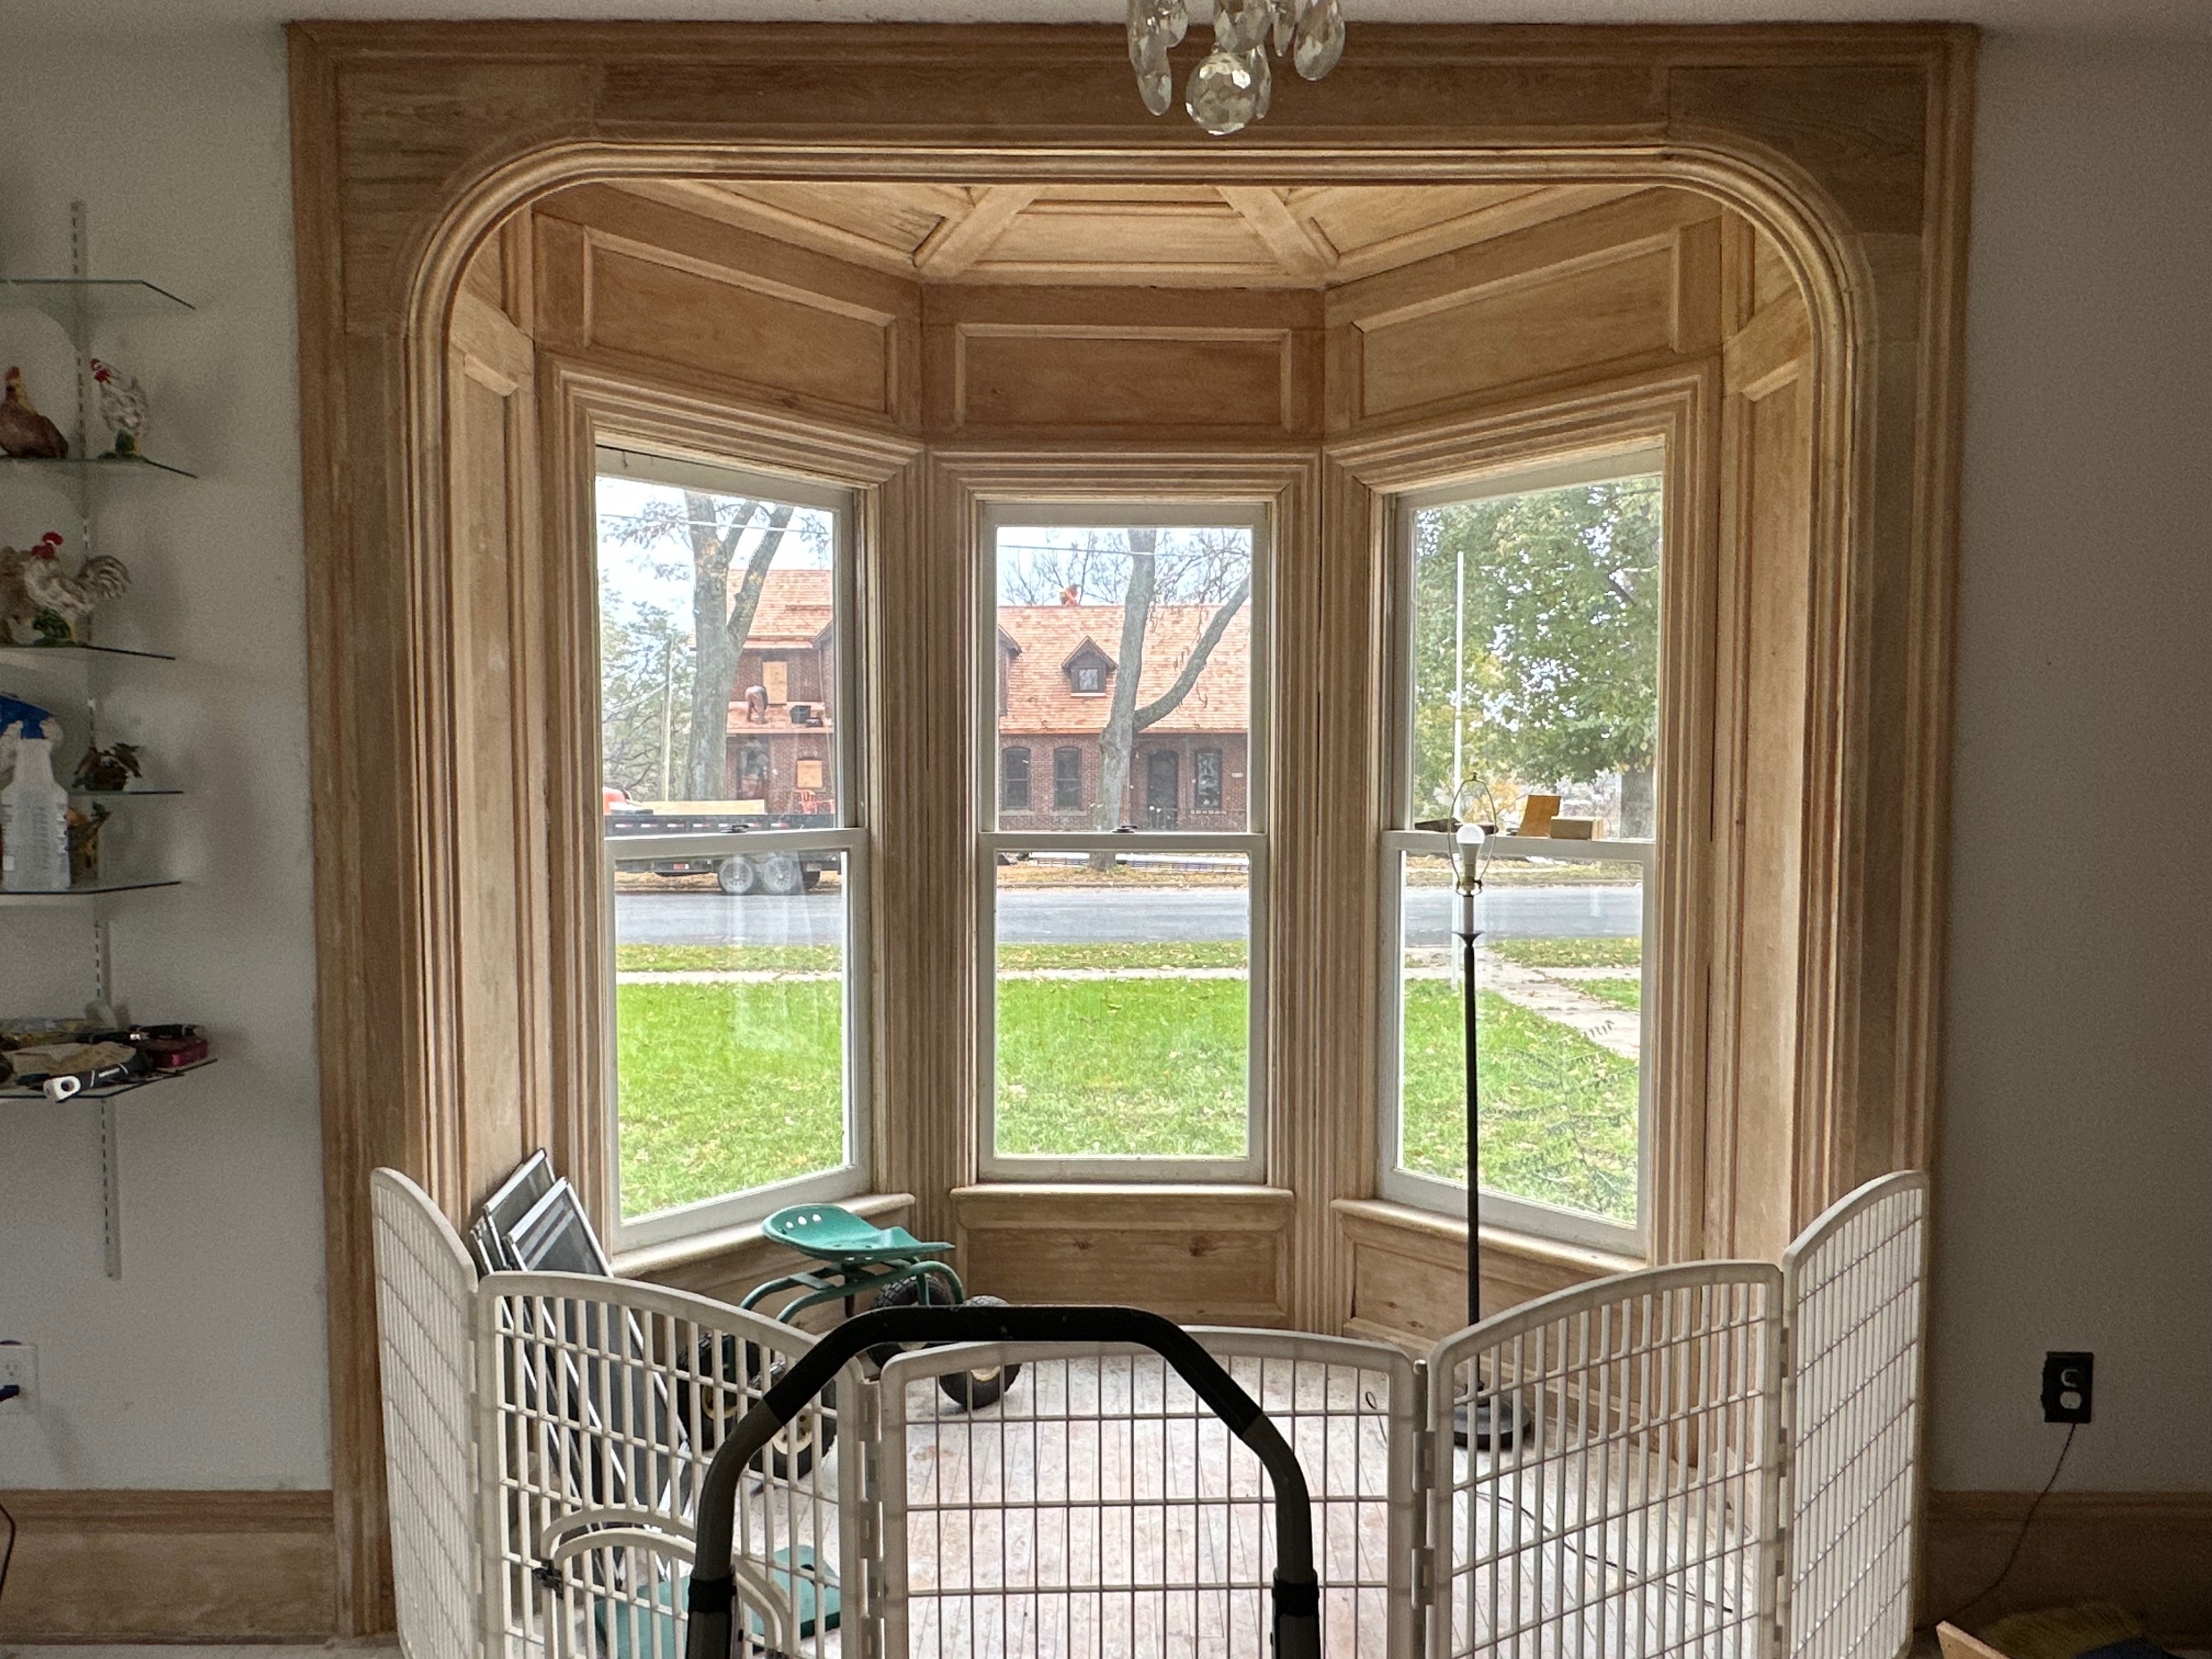
After: The original wood grain revealed and protected with clear coat.
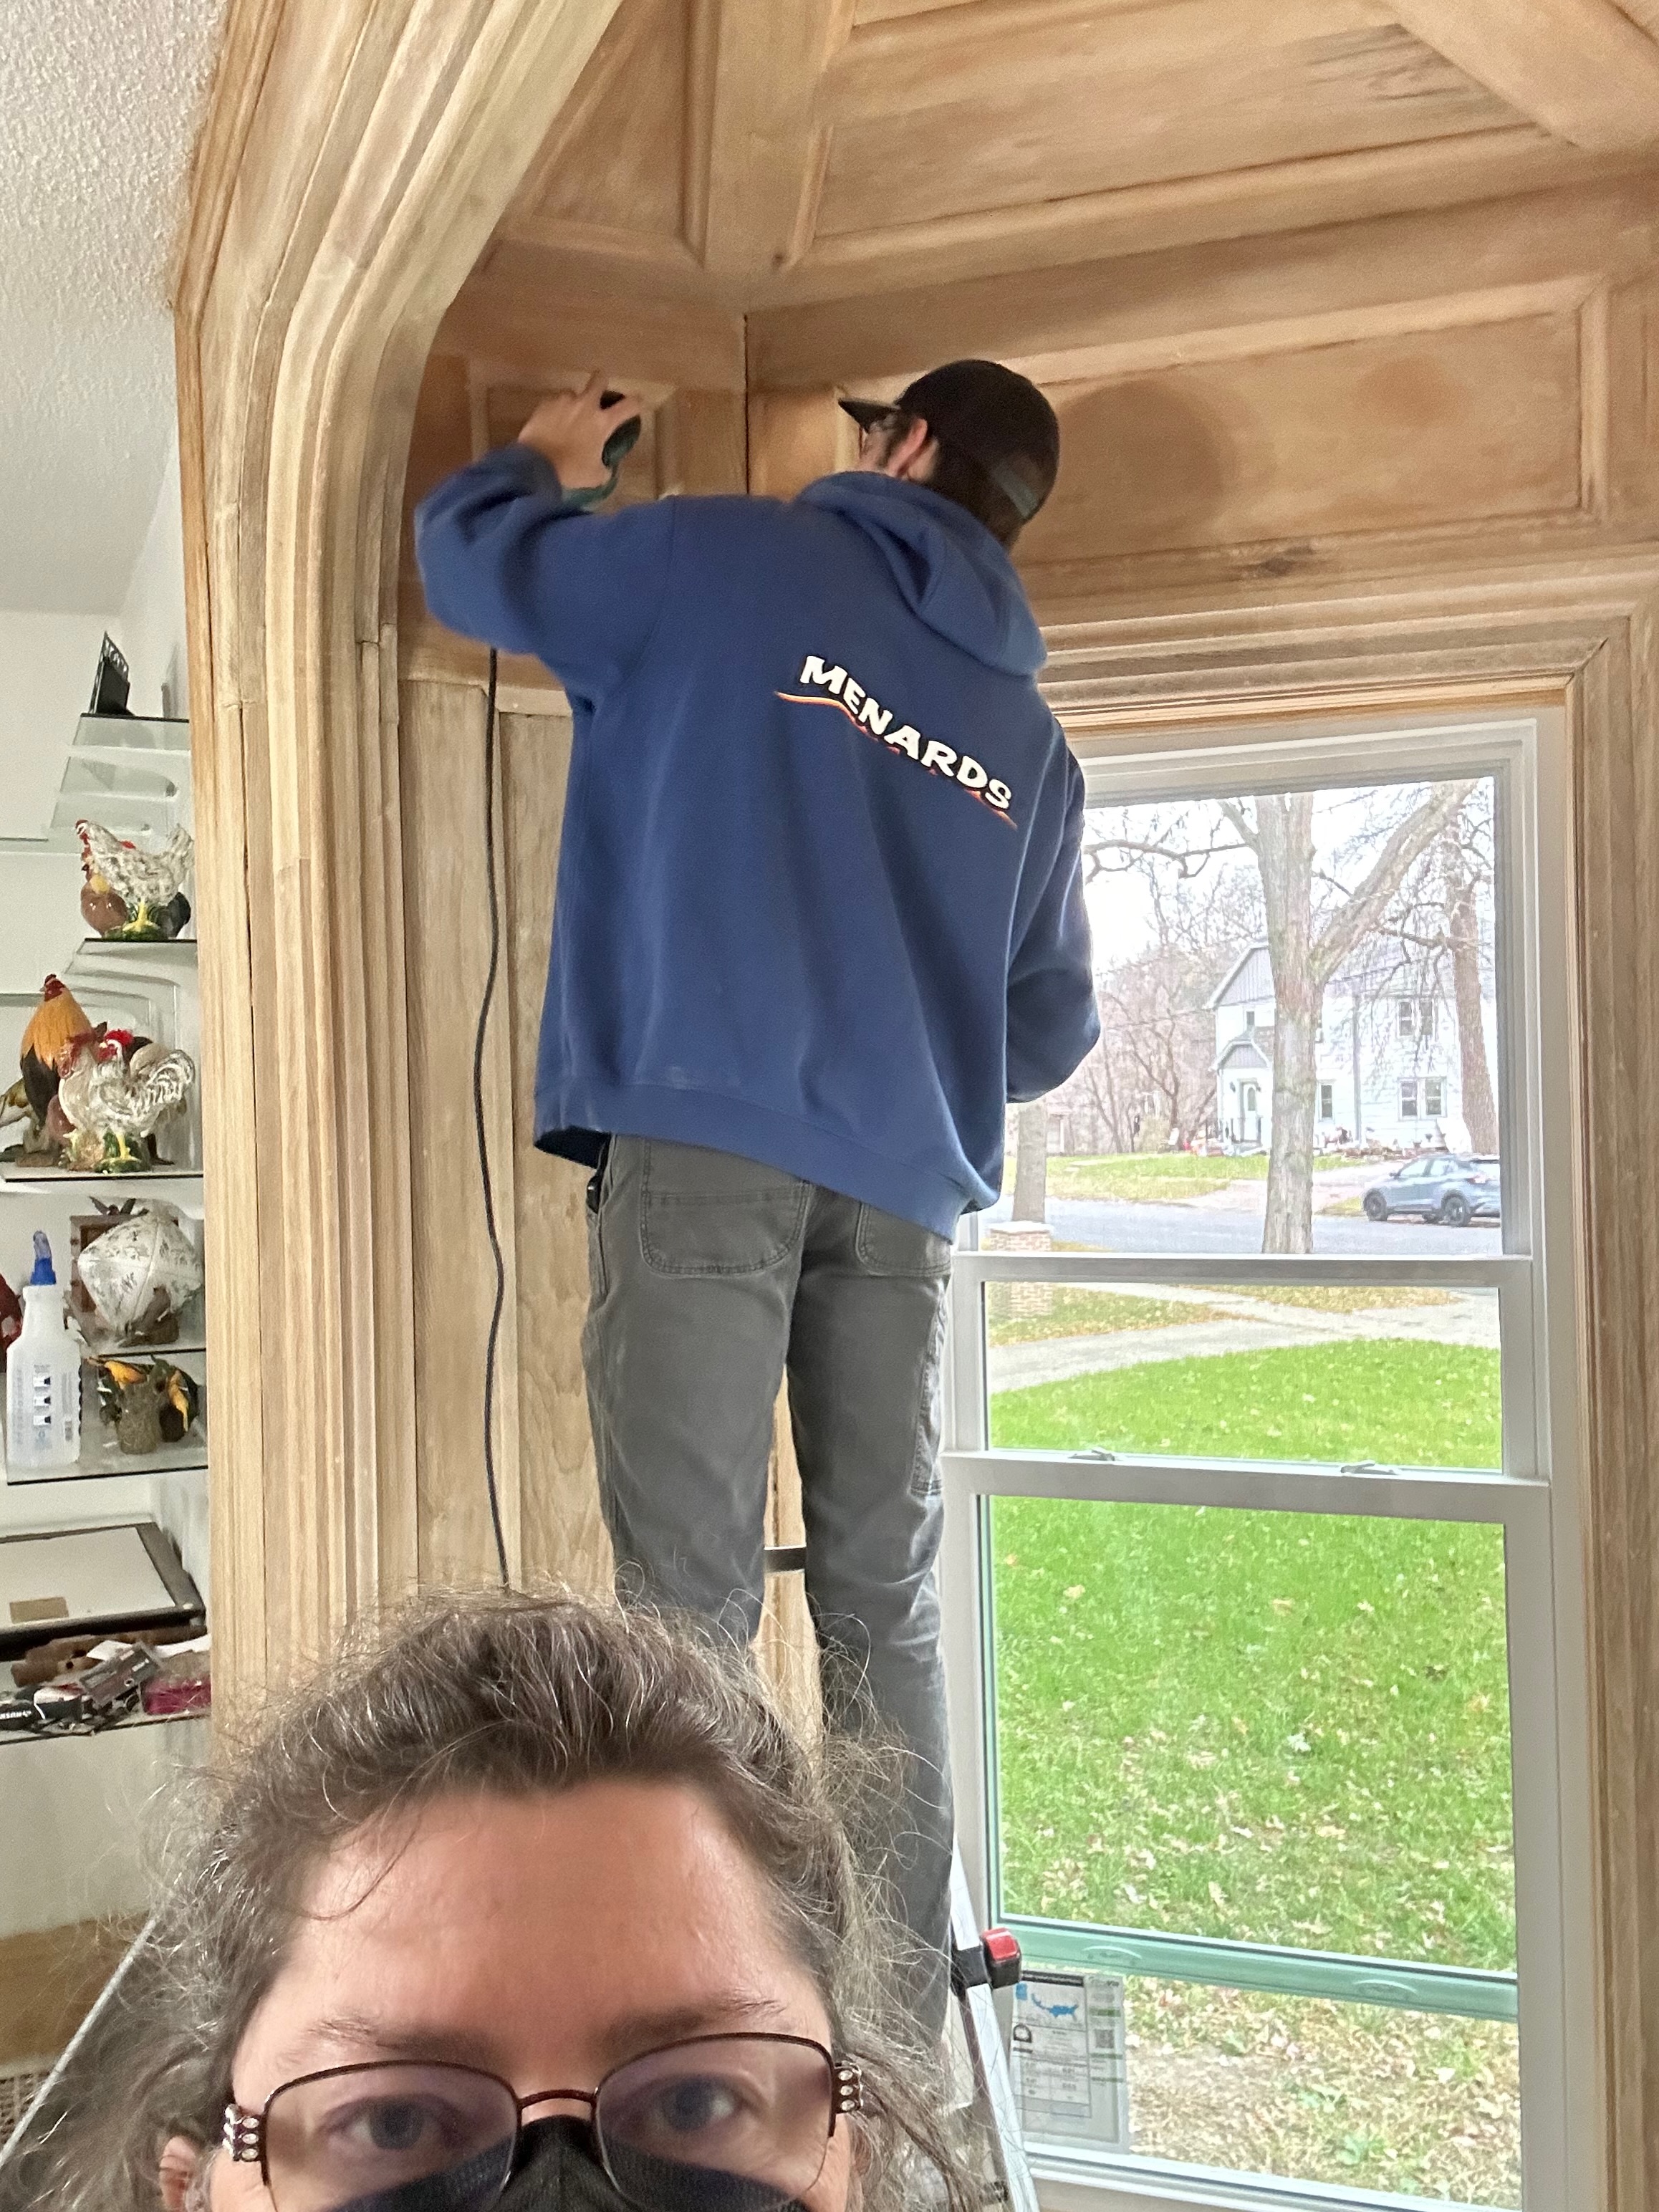
The Archway
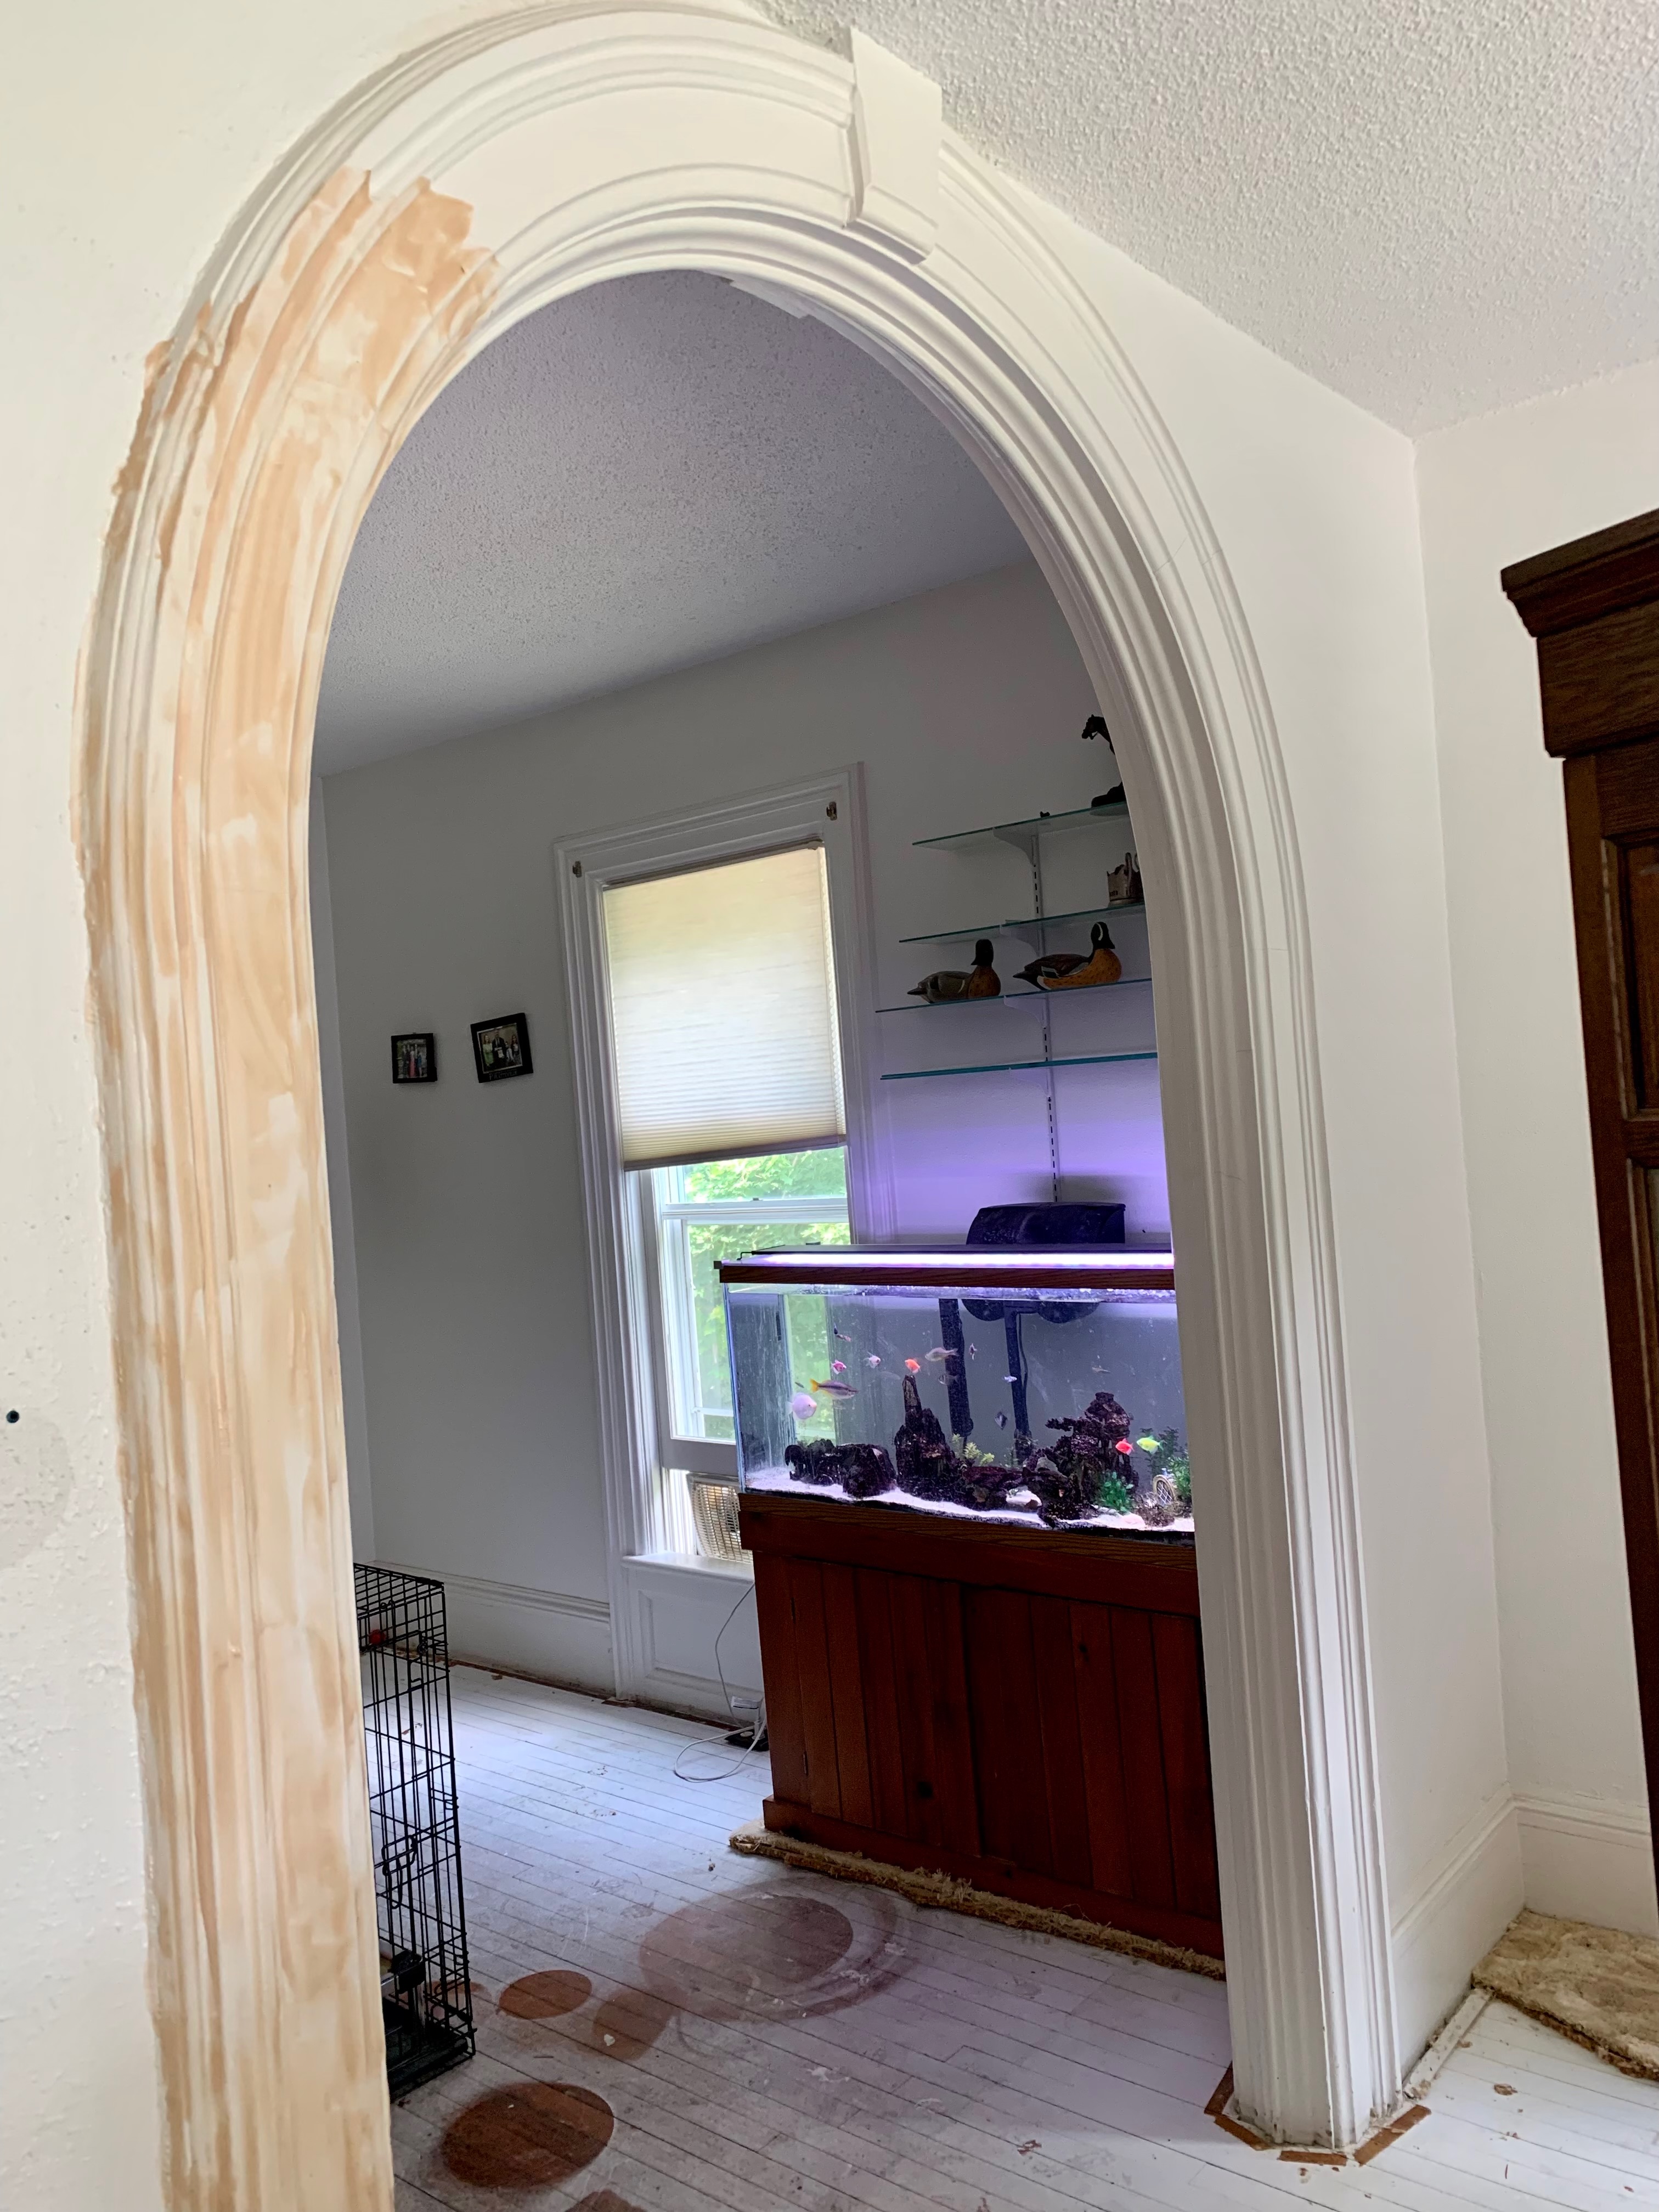 The archway mid-project: left side stripped, right side still painted. You can see the transformation happening.
The Room Overview
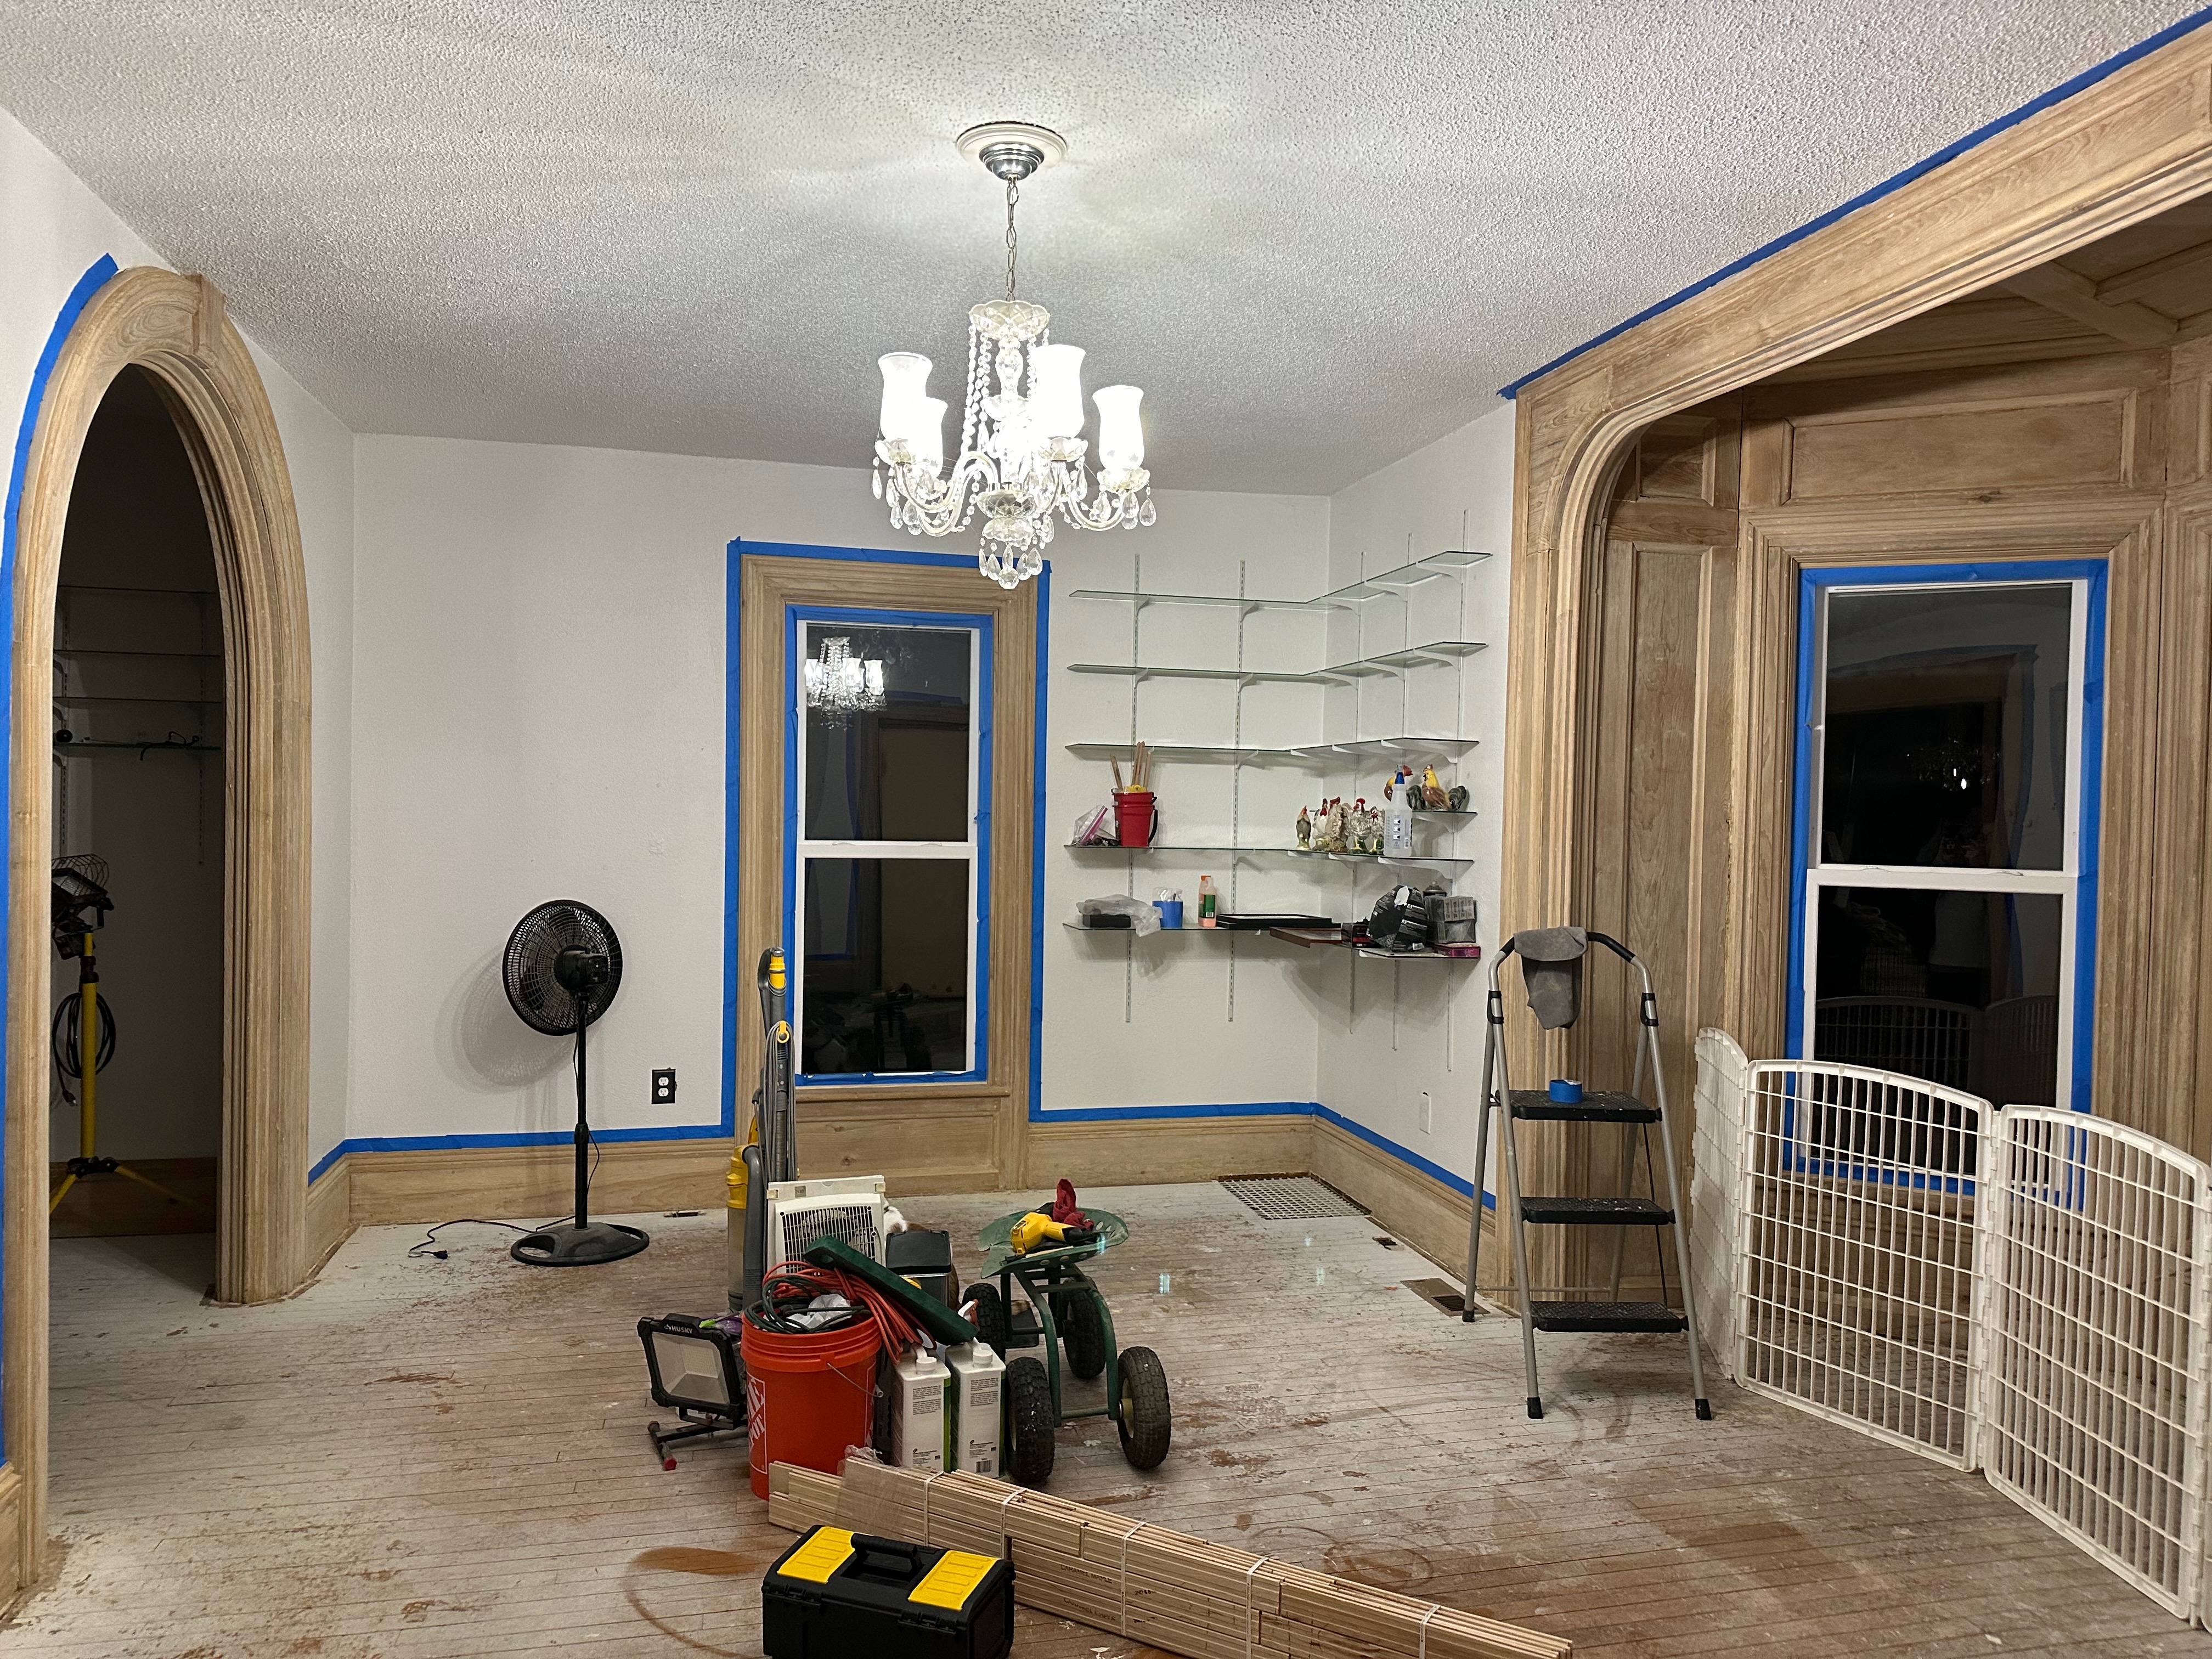 The sitting room in progress: archway, door, window trim, and bay window all stripped and ready for finishing.
Related Reading
- [Broader series on restoring a historic home sustainably - coming soon]
- DIY skill-building philosophy
- Other historic home restoration projects
Some things are worth saving. The trim in our 1866 historic home had been painted over eight times—but beneath those layers was original old-growth pine that’s been there since Lincoln was president. Restoration takes longer than replacement. That’s the point.